Showing posts with label capes. Show all posts

Tuesday, September 09, 2014

Photo Shoot on the East Side

I've neglected this blog for far too long now.  It's time to play catch-up!  

August was a tremendously busy month as I pushed to finish prototypes for a photo shoot that was scheduled in the second week of the month.  I booked a few hours at Working Proof Studios on the corner of Dundas & Carlaw.  It was smack in the middle of a Tuesday and I was grateful for how many of my family and friends were able to help out.  It was a great studio space complete with a make-up counter, a full modern kitchen, lovely seating area, and tall grand windows to light up the room.  After a bit of time tinkering with the lights and equipment we were well on our way.
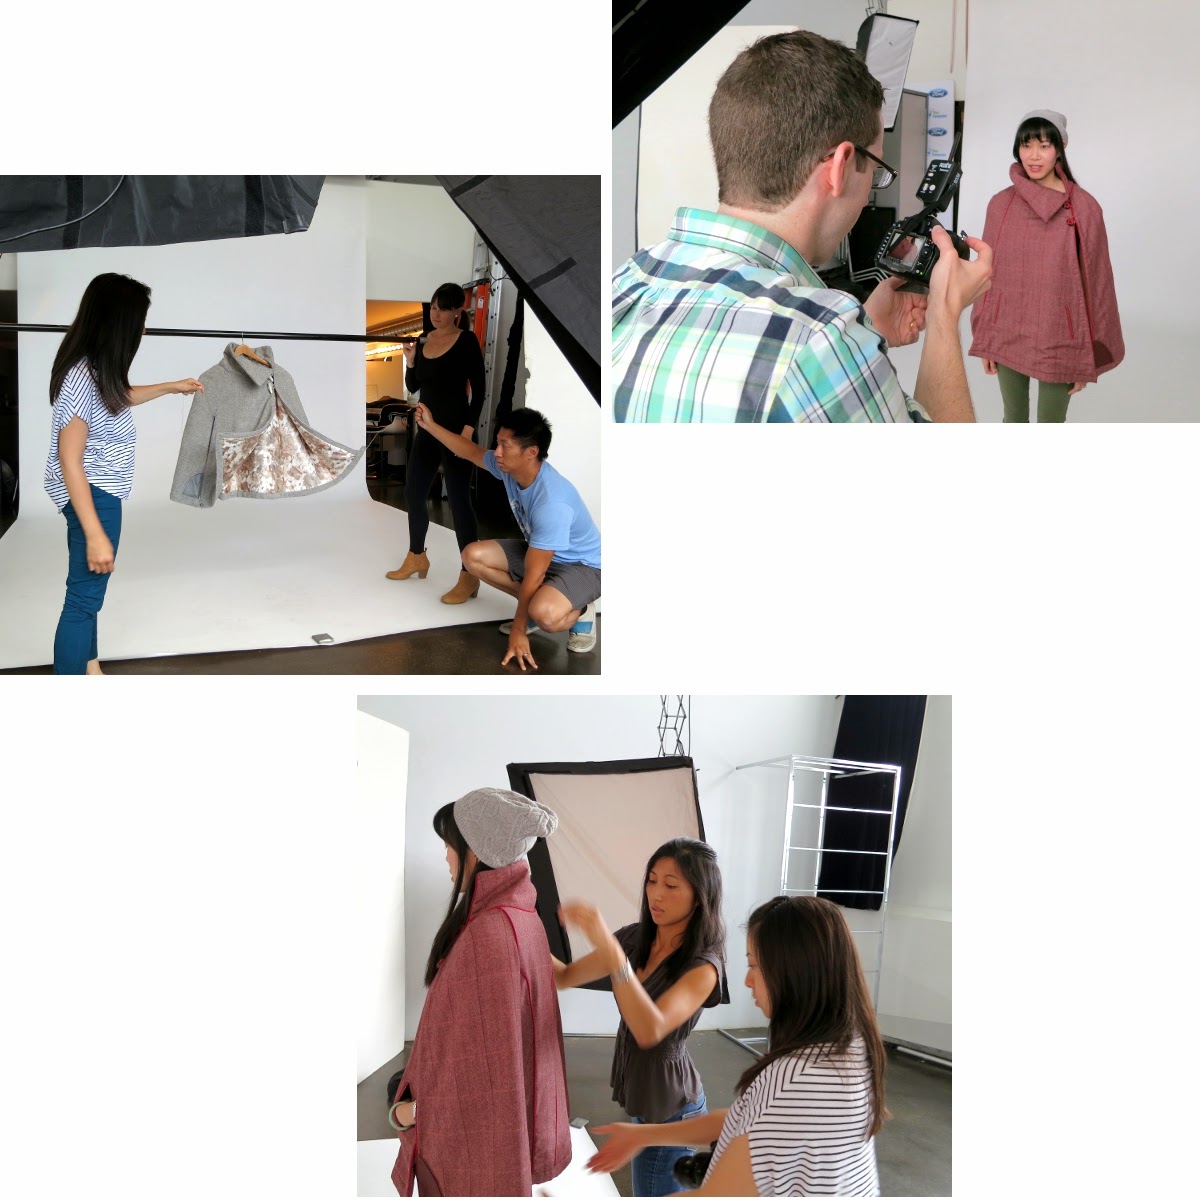

When I originally made the booking it seemed like 3 hours of studio time for a couple of capes and a handful of maternity inserts would be much more than I'd need.  Turns out that we managed to fill the entire time, all the while working at a brisk pace.  Poor Mike didn't even get out of his photographer's chair for a sip of water or bite to eat!

So you all must be wondering what this second set of photos is all about.  I mean, I've written several posts about my wool capes and shared plans on starting a business but I don't think I've mentioned before a new product line of maternity inserts I've been working on.  The first time they came up was during my own pregnancy when I needed a way to keep my growing belly warm as my clothes seemed to be shrinking away.

You might remember my post here from two years ago or the addition I made here for my winter coat.  The idea is adding an extension panel or "insert" to a jacket or coat which allows you to continue wearing it throughout pregnancy.  The extension panel can then be unzipped after pregnancy (and some recovery time!) and you can go on wearing your coat as before.  Anyway I'll dedicate my next post to talking more about these extension panels so let's get back to the month of August.


So yes, after the photo shoot came several days of photo editing, then trials of different website builders such as Shopify, Volusion, and finally Wix.  I found the user interface and degree of customization with Wix to be far better than the other two options despite it being not as popular as the other two e-commerce solutions.  Wix also doesn't require a specific trial period and allows you to design and save as many sites as you want so I could mock up several website versions for my cape business or maternity insert business.  I'm sure over time I will be come more intimately familiar with all the pros and cons of Wix but for now I'm quite satisfied.


Then what else?  Figuring out site content (featured products, FAQs, etc) and shop policies (shipping rates, taxes, etc).  It meant spending most of the last four weeks glued to my computer rather than my Singer but it was actually a fun switch.  I mean, I did start getting some eye strain and neck pain from poor posture at my laptop but designing my websites were pretty awesome. No, definitely awesome.  And besides, it's not like hunching over my sewing machine is all that different ;)


So yes, it has been an exciting few weeks and I'm thrilled to have officially launched Bridge the Bump last weekend to sell maternity inserts online.  And don't be surprised if you see them popping up in some Toronto baby boutiques over the next few months :)


I leave you with a few more awesome shots we took at Working Proof.


Thanks Vicky, Heather, Charlotte, Meghan, Kelly, Anisha, Freda, Eric (behind the scenes), and Mike (behind the camera!)

Wednesday, July 30, 2014

Silver Lining

Here I present the third (and potentially final) variation in my series of wool herringbone capes.


I chose another neutral colour, a lovely silver-grey, which I imagine will be stunning in the fall or winter months.  The piping is more subtle because of its colour which I continue to scrutinize. There is a slightly lavender hue to the piping colour which hints at a softer, more feminine look but I keep wondering whether a darker charcoal piping would have been a better match.  From a distance, like in the photo below, it is harder to notice the detailing along the back.


Finding a complimentary lining proved to be frustrating this time around as I had many second-thoughts.  I bought this blushing antiques polyester long before I was ready to start on the grey cape and at a time when I didn't have my wool swatches with me.  I kept circling the rows and aisles of fabric and returning to this one on the bolt.  Fine, I decided to buy enough for one cape and give it a try.

As I sewed my way through the chocolate brown cape I occasionally took out the blushing antiques fabric and laid it against the silver herringbone, examining it up close and from afar. Somehow by the time I finished the brown cape I had convinced myself there was something better out there.  

Another trip to Queen street and another afternoon poring over satins, polyesters, silks.  Feeling the pressure not to come home empty-handed I purchased a dusty wine-rose jacquard from King Textiles but was somewhat dissatisfied on the return trip.  I went as far as cutting out the entire lining and pinning it to the half-finished wool outer shell. Then I took out the blushing antiques polyester again and stared.  Then I stared some more.

Mike helped me to make the final call.  I presented the two linings and he promptly chose the floral without hesitation.  I think when you spend too much time obsessing about a thing it takes a step back, or an outside perspective, to see the right choice.


Now that the cape is in its final form, the silver herringbone and floral lining wonderfully coupled, there's absolutely no more doubt in my mind.  Mike's veto to the jacquard was well-played.


And you may have noticed that this cape has a label!  My labels arrived last week and I have been hand-stitching them into the capes I've already completed.  Going forward I will use the machine and also add a centre-fold label along one of the seams.  Shouldn't be long now before I announce the online opening of Red Herring Road featuring my collection of wool herringbone capes :)


Wednesday, July 23, 2014

Cobourg Photo Shoot

This week Jenny sent over photos she took for me last month of my red cape at the Cobourg farmhouse.  It was a last-minute "photo-shoot" before I had to leave, a huge favour from an artistic fellow crafter that I had met just that weekend.

I finally have some photos of this cape being worn by an actual person instead of just a dress form. Fabulous.  Thanks again Jenny - lovely pictures.  Too bad I had to model a wool cape in June though! Full-length jeans and leather boots would have paired so much nicer with the cape than capris :)


Wondering how to show off the lining here
Thanks Meg for making me laugh and distracting me so that "modelling" wasn't so darn awkward

Delicious Chocolate Cape

Nope, that's not a typo.  Delicious, you might wonder?  Sure this beautiful wool cape may not be too tasty but it certainly is pleasing to the senses.


Meet the latest addition to my wool cape collection, a more masculine herringbone piece in chocolate brown.  It is a slightly heavier wool than the red herringbone which actually made it easier to work with; fewer wrinkles, cleaner edges, less stretch.


A beautifully feminine jade-green floral crinkle polyester was chosen for the lining to balance out the chocolate.  I was a little hesitant at first to use crinkle polyester as lining but it still feels great against my bare arms and the print is just too gorgeous to pass up.  The pink and maroon tones in the blossoming peonies would actually make this a wonderful lining choice for the red wool as well.


Again I added a loop for hanging up the cape which is situated by the right shoulder rather than the centre neckline.  This allows the cape to hang more uniformly since the opening of the cape is asymmetric.


One minor change in the design of the cape is to the button enclosures near the bottom of the arm slits.  Previously on the red cape I used just a loop with a 4-hole flat button but the attachment was not as secure as I would have liked.  Perhaps elastic cord would have worked better to keep a snug fit against the button but I wasn't thrilled about that option. 

This time around I went with old fashioned buttonholes.  I also switched out the flat button with a shank button.  Much better connection.  

And here's how the Singer makes buttonholes.  No, I can't just press the "buttonhole" option on my machine. Instead I have to switch out the standard foot and screw in this stapler-sized contraption.  I know...pretty awesome.  


Since the needle on the Singer can only move in a straight line, this device clamps down on the fabric and moves that from side to side to complete the stitch.  Same concept applies for the zig-zag attachment I have (I know, a separate attachment for each stitch style). 

The buttonholer comes with a set of cams of different sizes.  The 9/16" worked perfectly for this application.

And here's the result.  I still prefer to wear the cape with the slits unbuttoned at the bottom to show off the lining which is intended to be a feature of this piece.  On windy days though, I can see how these buttons will come in really handy.


Finally, guess what? This cape was made to sell.  That's right, I am in the process of starting a small collection of wool capes that will be up for sale in the not-too-distant-future.  Stay tuned for more details and feel free to contact me through this blog if you are interested. I will be posting photos of a silver-grey cape before this month's end :)

Wednesday, June 04, 2014

The Fabulous Red Herringbone Cape

The Wool Cape, version two point oh-so-lovely.


I love this cape. I really do.  Of course, I'm biased.
My fabulous new herringbone cape took about a week to make, although I lost track of how many actual hours were spent sketching versus pattern-making versus browsing online fabrics versus sewing (...versus staring off into space).  

It all paid off.  There are two dozen details I'd love to share about what went into making this cape but I doubt most people really want to hear all about the intricate details, the design decisions, the mistakes, the frustrations.  Mike has no choice (once as he was falling asleep I rushed into the room to tell him all about the welt pocket I just finished) but for you I'll just highlight some features.

The Lining

Beautiful, no?  I found this piece at Fabricland (of all places) and I think it was in the outdoor fabrics section.  Can't quite remember but it was somewhere I wouldn't have expected to find fabric that could be used as lining.  It's a little thicker than actual lining but is still silky smooth and has a gorgeous floral print.  I actually bought this piece weeks before I ever got the red herringbone wool to know it would be such a good match.  Just a hunch, I suppose.


Original loop placement
In this version of the cape I added wool pieces to the lining half to make it look more finished.  Also put in a loop for hanging up the cape, something I forgot in my first one. Originally the loop was centred along the back neckline (where you'd expect a loop) but because the cape is asymmetric that caused the whole thing to hang awkwardly.  I had to move it over to the right shoulder, which looks odd from the inside but allows the cape to drape much more evenly without tilting to one side.

Final loop placement by right shoulder

The Piping

The wool wasn't quite as red as I originally wanted so I chose sharper reds for the accents. I knew I wanted to put more piping detail in the back but played around with 3 different options before settling on this one.  The first prototypes with muslin were good but had too many lines. This one is cleaner and simpler but still gives that extra pop of colour.  Now I just have to muster up the courage to take out the iron and press down the back panels flat since the cape definitely needs some iron lovin'.  Please oh please don't let me burn this piece!


The Pockets

This is only my second project with welt pockets.  I found a good tutorial here for sewing a single welt instead of the double I tried last time.  I did two practice runs with muslin and then went for it on the wool front piece.  At the last minute before pinning the welts to the wool I decided here was another good opportunity to add piping :)  Then for the actual pockets I used the same lining fabric for kicks.


The Leather

Here's the leather piece I found from the Leather and Sewing Supply Depot that sold me on this wool. I had entered the store with just a sample of the red wool, found this great colour of leather, then promptly returned to Designer Fabrics to purchase enough wool for the full cape.  I didn't know where I wanted to add leather detailing but I knew I wanted it.  

In the end I added leather to the bottom corners of the wing panels and love the overall look but need to practice with sewing leather.  I didn't want to leave the edge raw so I doubled it underneath but it made for quite a thick layer, especially where leather meets piping.  The Singer foot slipped a few times and the top-stitching isn't as clean as I'd like it.  Maybe it wouldn't be so obvious if I had used matching thread but contrasting thread on top of leather looks so much better.  We'll see if this feature makes it into future capes.


The Buttons

Again these colourful chic buttons were found at  good ol' Fabricland.  The original idea was to use toggle buttons to close up the cape but I loved the look of these red buttons too much.  I decided to add an extra loop on each wing panel and small buttons on either side of the front panel so that the cape can be closed along the bottom if desired.  I will leave these buttons undone pretty much all of the time since the lining is displayed much better with an unconstrained cape.  However on particularly windy days it'd be nice to walk down the street without all the cape panels fluttering chaotically around your ears.  Not very stylish.


So that sums up my new Red Herringbone Cape and all of its new features.  I finished up the last of the hand-stitching last night while watching the second half of the Ontario Leader's Debate (they're all robots) and 1 1/3 episodes of How I Met Your Mother.   I told Mike I wasn't coming to bed until it was all finished :)

Hopefully soon I can get some shots up of me actually wearing it, despite the wrong season, but for now I have to rely on photos of it with the trusty dressform.