Showing posts with label rings. Show all posts

Tuesday, April 03, 2012

Lost Wax Casting: Floral Ring


Here is the last jewellery project I designed from my model making course which ended in January.  It was my first real project where I had to do a lot of tiny intricate carving.  The cuff bracelets I made were easier to work with because I had more surface area and the designs weren't detailed, although of course it took much longer to finish each bracelet.  I definitely saw an improvement in my carving from when I started to when I finished this ring, and in fact what I'm showing off below is the nicer side :)  The floral stems flow much more smoothly on this side than the other.
Ring in sterling silver prior to polishing
It took a number of weeks before I decided to finally cast the ring.  There are several casting houses downtown but none seem to be open on the weekends and they're usually closed by the time I get home from work. I ended up taking it back to Shao's studio (where I got my floral cuff bracelet cast).  Then I rented 2 hrs of studio time there to clean it up nice and shiny.  I darkened the recessed areas to bring out the details of the carving and couldn't be happier with the results!

Final wax model 
Ring after polishing and oxidization

Saturday, October 01, 2011

Lost Wax Casting: Butterfly Ring

In my model-making course last year I didn't put much focus on rings aside from the mandatory projects that were aimed at teaching us the basic measuring and filing skills.  I mostly worked on pendants and my koi cuff bracelet because they don't require the level of symmetry that rings do.  This year I need to try a few rings to improve my skills though, so here is my first project - a butterfly ring.

My vision for this ring was to have a huge butterfly wrap around my middle finger and then carve lots of details into the wing.  Well it didn't quite turn out as planned.  The ring didn't start out as long of a tube as it should have so the butterfly had to be drawn much smaller than I had initially wanted.  That left little room to carve details into the wing so I kept it relatively simple.    


It didn't take much silver to cast this ring.  In fact I was able to reuse most of the sterling that was recovered from my koi cuff bracelet.  I'm debating whether or not to solder on some silver wire for antennas as the last bit of detail but I'm not in love with the ring so I haven't been inspired yet.  To be honest I already have my next bracelet project in mind and am eager to move onto it!


Sunday, March 06, 2011

Gem Setting

The first-level Gem Setting course was offered at George Brown during the winter term and I took it over seven Saturdays for six hours each day. It was by far the most expensive jewellery course offered at the college and I had to purchase a number of tools that cost extra from the tuition. Overall I was very disappointed with the experience and definitely think that it should have been more hands-on for the 42 hours that were invested in it. Despite that feeling I wanted to post the projects I completed anyway since I've been doing so for all of my other courses. 


The rings we worked with were silver cast rings which were tumbled and had a rough finish.  These were provided to us by the instructor. The course focused strictly on the gem-setting technique and we weren't supposed to "waste time" finishing off the rings but I thought it would actually be a waste not to finish them once the cubic zirconia stones were set (which is the hard part). Since there was extra time during each class I went ahead and filed and polished the first three projects after setting the stone.

1.  Four-Claw Setting
We started with the four-claw setting which taught us to use high-speed steel burs, triangle files, and pumice wheels. It was a little unnerving trying to make bearing cuts into the silver claws to match the shape of the stone and secure it in place. The contact surface was extremely small between the bur and the claws. Several times as the bur was spinning it skid across the claw and nearly wrapped around my thumb - yikes! That would have been messy.


I also had a difficult time getting used to wearing the optivisor and eventually just used the lowest magnification available (1.5x) so that I wouldn't get disoriented every time I looked up from my bench pin to reach for a tool.


2.  Bezel Setting


For our second ring we learned about the bezel setting which I found to be easier than the four-claw. We still needed to use the high-speed steel bur but cutting a groove along the inner wall of the bezel was not nearly as daunting as trying to cut out even grooves in the four separate claws. There was a lot of hammering with this ring to displace the metal along the top of the setting which clamped the stone into place. I didn't mind all of that tapping though, probably because it felt like nothing compared to the intense hammering from my silversmith course with my copper bowls!


3.  Channel Setting
For the channel setting we used 156C Tungsten burs to cut out grooves in the channel wall. The spacing between the teeth of the 156C burs is tighter than the spacing for the high-speed steel ones which makes them less aggressive to use. This ring had only five stones but took me a few hours to set because of my inexperience.

After setting all of the stones into the silver ring by hand, we learned the technique of setting stones into wax. I didn't realized that rings could be cast with stones already in them but we learned that rubies, cubics, and blue sapphires are hard enough to withstand the heat from the casting process. Setting these stones into the wax ring gave us a direct comparison between the two techniques. Hand-setting took several hours (for an amateur like myself)...setting in wax took less than 10 minutes! Unfortunately not every design can be set in wax which is why the skill of gem-setting is still important.

4.  Gypsy or Flush Setting
Our last project was the gypsy setting with 13 small cubics. Needless to say this took some time to complete! Again it took me several hours to set in metal but only 15 minutes to do in wax. I didn't get a chance to polish this ring so it still has the brushed metal finish to it.


After completing this fourth project I do not feel at all prepared to try even a simple setting on my own at home. It's not that I expected to be a master gem-setter after only 6 weeks of courses but I thought the course was poorly taught and poorly organized.  I would not recommend it to anyone (and I'll leave it at that!)

Sunday, October 10, 2010

Silver Band Ring

This silver band ring project was designed to make us practice our soldering, sawing, and polishing techniques.  We all started with a strip of silver 10mm wide.  After hammering, bending, and soldering the silver strip into a simple band ring we had to divide the ring into equal sections and add our own designs to each piece.  The final challenge was to solder the equal pieces back into a single ring.  Sound difficult? It was!

After my first soldering attempt the solder hadn't completely filled to edge of the gap so I had to add more after cleaning off the layer of oxidization. 


It took me a whole hour to saw the band ring into 3 pieces of equal width because I was trying to keep the cuts as straight as possible. The extra time it took me to saw the band ring paid off in the end because I didn't have to do nearly as much filing as I had feared to get the sides parallel with each other. In the end when I stacked the rings back together I measured about 9mm so I only lost 1mm in the process.

You can see the simple design I chose for the three pieces. I used the saw blade to cut the grooves in the middle ring and then filed semi-circles into the edges of the three pieces.
Here is the finished band ring after I soldered it all back together again. It turned out well on the outside but not great on the inside, which is better than having the opposite happen but is not completely satisfying.

The soldering went relatively well and none of it got into the grooves of the pattern, however I could have been more precise when wiring the three thin rings together into a stack to begin with. The middle piece was out of centre by a few fractions of a millimeter which was evident when I went to file the outside. I managed to file away the solder grooves from the outside except where they were intentionally left as part of the pattern on the top. Unfortunately You can see two thin dark lines on the inside of the ring where the solder grooves were.  Eventually the instructor told me to stop filing because the ring was getting too thin.  My OCD made that a challenge to do!


Saturday, October 02, 2010

Lost Wax Casting: Carved Stone Ring (cont'd)

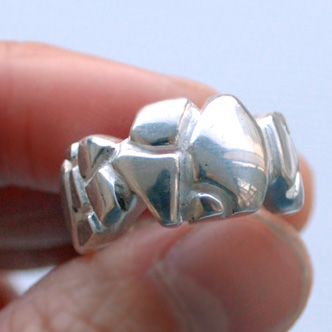
Here is the ring after I polished it with Tripoli compound.  There is excess Tripoli in the grooves of the ring which is why the cracks have a dark finish in these photos. It's a pretty nice effect but if I want to make it permanent I'll have to use some sort of chemical solution.


I put the ring into the ultrasonic to clean out the Tripoli and the ring was gleaming bright!

Friday, September 24, 2010

Lost Wax Casting: Carved Stone Ring

Here's my first completely independent project that I made at home in prep for my casting class. I was under the gun to get something ready to create a plaster mold of so I looked up various designs online for inspiration. I didn't want to choose anything too difficult since I'm lacking in tools at home and I thought there was a lot of forgiveness in this design. If I screwed up a crack here or there, well who could tell anyway right?


I was nervous to make my first casting since it's a fine balance between the water and investment powder that needs to go into the mixture.  In the burnout stage of the casting process the wax model is melted away and I certainly didn't want to lose my wax model for nothing.  Luckily the mixture was just right and I was able to melt down 20 grams of sterling silver for this ring.


The ring itself is roughly 13.5 grams of silver (pretty heavy for your finger) but the added silver was required to account for the sprue (wax branch that creates the channel to inject molten silver) and for shrinkage.

I heated the silver beads using a large torch after they were added to a container in the centrifuge, and once the silver became molten the torch was removed and the lid of the centrifuge was immediately closed, triggering the motor to start. The spinning process was about 2 minutes.


After letting the plaster mold and casted silver piece cool for another 6 minutes the cannister was plunged into a bucket of water and swirled around dissolving the plaster. I retrieved the oxidized ring which was a gunmetal grey and threw it in the pickle solution (sulfuric acid). After about 10 minutes and some scrubbing with baking soda it came out gleaming white from the thin layer of pure silver coating the surface.


 I was surprised how much the material looked like plaster rather than silver but was told that a little light polishing would get rid of the the fine silver and reveal the familiar colour just below the surface.  I sawed off the sprue and filed down the ring to smooth out the edge.  I'll wait until next week to start the polishing.

Carved stone ring with fine-silver coating


Friday, September 17, 2010

Lost Wax Casting


I started my casting course at George Brown on Monday nights and it's looking to be a fun course.  In the lost wax casting process the metal piece (jewellery, ornament, or other) is cast from a wax sculpture or model. Typically the jewellery created using investment casting takes on a more organic or three-dimensional shape which may be too difficult or wasteful to create by working with metal directly.  I was excited to take this course at George Brown because working with wax was going to be very different than working with metal and I thought it would give me more freedom to design my pieces.


First things first, I had to learn the basics of filing wax which was tedious for someone as impatient as I am!  We started with a simple band ring, then moved onto a man's signet ring which was a bit more tricky.  The wax was much easier on my hands than metal is but I did have to wear a mask to prevent inhaling too much of the filings.


Thursday, January 07, 2010

More Deviling at the Workshop

After having such a great time at the wedding band workshop I signed up for a 6-week Silversmith class at the Devil's Workshop in the fall.  It was such a nice escape to spend 3 hours there every Tuesday night, focusing on just the small projects in front of me and spending an evening with other women.  The cozy studio has room for only 6 students which I thought was a perfect size for an intimate setting.  

Silver ring


Cufflinks for Mike

Over those six weeks I worked on three projects. I started with the silver ring which taught me some new techniques such as drilling, sawing small shapes, and testing the hammering effect on silver.


Next I used matching Tiger's Eye cabochons to create a pair of cufflinks for my Mike which was a real challenge when it came to setting the stones. I was really proud of the results and Mike has already worn them at least once!


Earrings for me!


Finally I finished off with a pair of leaf earrings for myself.  It was really cool dipping the gleaming silver pieces into a clear sulfur chemical solution and watching the metal instantly turn black!  I then lightly polished the leaves and all of the more recessed points were left with the dark patina.


Sunday, January 03, 2010

The Devil's Workshop: Wedding Bands

Last year when Mike and I got married we made our gold wedding bands at the Devil's Workshop just a 5 min walk away from us on Queen St. West.  My brother put the idea in my head when he told me about some friends that had tried it out.  Having never done any type of silversmithing before I was very skeptical that we could make wedding bands that didn't look...well...home-made.  It was too intriguing to pass up though, and since we both wanted very simple wedding bands we signed up for the 1-day wedding band workshop.


Above you can see the two strips of 18k gold that we transformed into our wedding bands.  In the top right photo is the cozy studio where we spent the afternoon.  Below I'm sawing the strip of gold down to the right length for my ring.  Next came filing and sanding the edges to make them nice and square.


We used a raw hide mallet and ring mandrel to pound the metal into shape.  This was a cute photo that the owner of the studio took.


Using ring-bending pliers (round on one half and flat on the other) we brought the ends of the ring together to form a tight fit.  Here's where we got to see just how good a job we had done squaring off the ends of the gold strips.  To properly solder the ring together it was crucial that the ends butted up against each other without gaps.

Here Mike is soldering his ring together.  Prior to applying heat the ring was dipped in flux to clean the metal's surface.  The flame caused the flux to bubble and dry up which is why it looks coated in white foam.


Then it was my turn to work the flame...


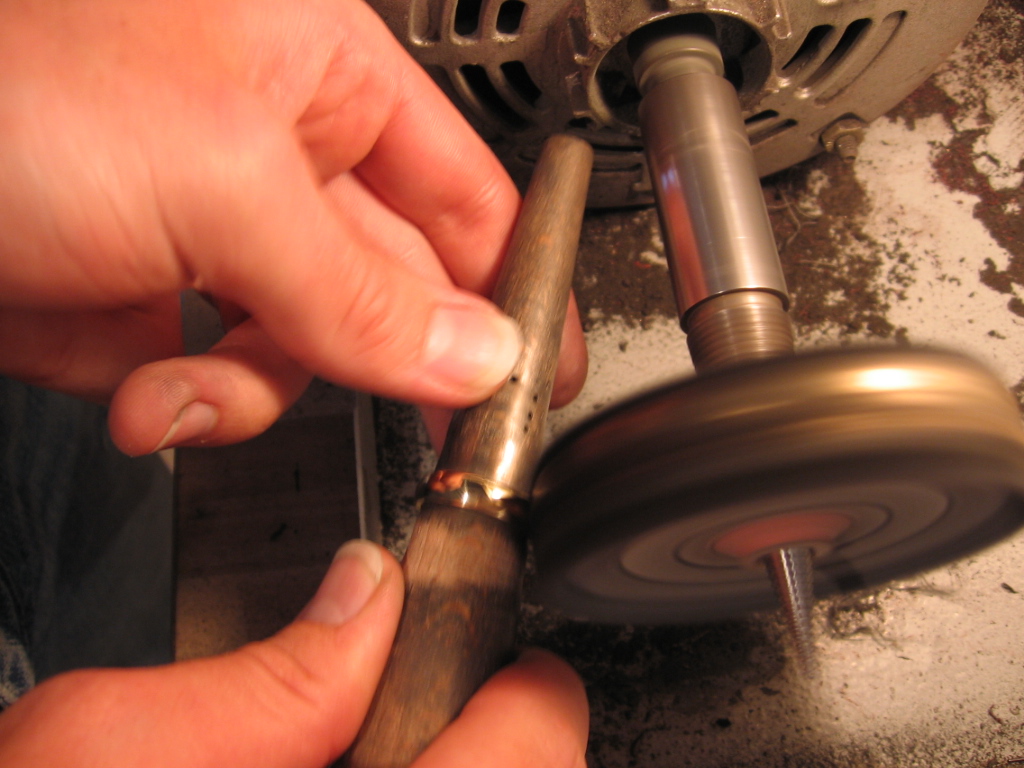
Once the rings were soldered and cleaned we spent a considerable amount of time pounding the rings on the mandrels to shape them into perfect circles.  Next came polishing with emery paper for what felt like most of the afternoon.  It was the most tedious portion of the workshop, and pretty exhausting on the hands and arms, but it was necessary to eliminate the larger scratches before the final polishing step (shown below).

Using the polishing wheel to bring out the shine!
And now....(drum roll)...check out these rings!  They look like we bought them in a store!  I'm so glad we decided to sign up for this workshop and would recommend it to anyone who wanted to try something special.  Oh, and if you decided you wanted little diamonds set flush with the surface, or some pattern etched into the ring for detail, you could always leave your rings with the owner to do for you after the workshop.  We chose to keep our wedding bands plain and simple and were thrilled to take them home with us that very day.

Our 18kt gold wedding bands, made with love.