Showing posts with label jewellery. Show all posts

Tuesday, April 03, 2012

Lost Wax Casting: Floral Ring


Here is the last jewellery project I designed from my model making course which ended in January.  It was my first real project where I had to do a lot of tiny intricate carving.  The cuff bracelets I made were easier to work with because I had more surface area and the designs weren't detailed, although of course it took much longer to finish each bracelet.  I definitely saw an improvement in my carving from when I started to when I finished this ring, and in fact what I'm showing off below is the nicer side :)  The floral stems flow much more smoothly on this side than the other.
Ring in sterling silver prior to polishing
It took a number of weeks before I decided to finally cast the ring.  There are several casting houses downtown but none seem to be open on the weekends and they're usually closed by the time I get home from work. I ended up taking it back to Shao's studio (where I got my floral cuff bracelet cast).  Then I rented 2 hrs of studio time there to clean it up nice and shiny.  I darkened the recessed areas to bring out the details of the carving and couldn't be happier with the results!

Final wax model 
Ring after polishing and oxidization

Friday, February 10, 2012

LUG Flipper Clutch

Guess what?  LUG's new Flipper Clutch came out online this week and one of the photos features three pieces of my jewellery!  How did I manage to swing that, you ask?  Well my sister-in-law Freda works at LUG and helped to set up the photo shoot back in November.  She needed some props for the photos...random items you might find in a woman's purse, I suppose.  I handed her a whole collection of things hoping that something might get featured in one of the photos...and it worked out!


In the photo below my chandelier watchlet is peeking out of one of the zipper pockets, while the silver leaf bracelet I have on my beadmarket website is in the detached pouch.  There is also a beaded necklace with pearls in the pocket on the left side.  I know I know, there's no mention of beadmarket and no one would ever really notice these things but I certainly did :)
LUG Flipper Clutch photo from website

Monday, January 02, 2012

Lost Wax Casting: Floral Bracelet (cont'd)


Over the holidays I read about an easy way to add a dark patina to your sterling silver with just a container and some hard-boiled eggs.  The sulfur released from the eggs reacts with the metal the same way that the Liver of Sulfur chemical does, only much slower.  After boiling one egg I peeled the shell, cut it into quarters, and put the sections into a clear container with the bracelet while the egg was still hot.  The clear container keeps the sulfur in while allowing you to monitor your silver piece (which was still tricky due to the condensation).  After about an hour I was satisfied with the colour and took out the bracelet.  This is what it looked like!

I used a silver-cleaning polishing pad to remove the dark patina from the high points of the bracelet and voila!  Here is a photo of the finished product (with my first bracelet in the background).


Thursday, December 15, 2011

Lost Wax Casting: Floral Bracelet (cont'd)

I ended up giving my wax model to my casting instructor from last term to cast into sterling silver.  I picked up the bracelet this week and got right down to business polishing it so I can wear it during the holiday season.  Here are pictures just after I sawed off the sprues.  My instructor said he made two of them to ensure that the molten silver would flow evenly to the rest of the bracelet and pick up all the details of the wax model.

It took about an hour to polish the bracelet using a combination of emery paper, small polishing brushes, and finally the polishing wheel at George Brown.  The bracelet looks and feels great on my wrist - I'm definitely going to show this off during the holiday celebrations!


Friday, November 18, 2011

Lost Wax Casting: Floral Bracelet


Here is my second bracelet project and I am determined to make it more wearable than my previous one.  I found a neat flower stencil online and put together a design with four flowers in a row with room for filler in between.  I actually started carving most of the flower design before coming up with the pattern that connects them. My instructor had various sizes of cup burs which allowed me to create the tiny circles without too much trouble.


To help ensure this bracelet is lighter and more comfortable to wear I drilled out a number of holes in the flowers designed it so that much of the border material is cut away.
Here is my bracelet after several hours thinning out the bracelet and removing the border material.  I think the irregular shape makes this piece much more interesting than a cuff that is the same width all around.  I'm excited to see it in metal but this time around I will not be casting it myself since I no longer have access to the equipment.  I'll have to seek out some casting houses downtown or talk to my instructors about it. We'll see.


Saturday, October 01, 2011

Lost Wax Casting: Butterfly Ring

In my model-making course last year I didn't put much focus on rings aside from the mandatory projects that were aimed at teaching us the basic measuring and filing skills.  I mostly worked on pendants and my koi cuff bracelet because they don't require the level of symmetry that rings do.  This year I need to try a few rings to improve my skills though, so here is my first project - a butterfly ring.

My vision for this ring was to have a huge butterfly wrap around my middle finger and then carve lots of details into the wing.  Well it didn't quite turn out as planned.  The ring didn't start out as long of a tube as it should have so the butterfly had to be drawn much smaller than I had initially wanted.  That left little room to carve details into the wing so I kept it relatively simple.    


It didn't take much silver to cast this ring.  In fact I was able to reuse most of the sterling that was recovered from my koi cuff bracelet.  I'm debating whether or not to solder on some silver wire for antennas as the last bit of detail but I'm not in love with the ring so I haven't been inspired yet.  To be honest I already have my next bracelet project in mind and am eager to move onto it!


Friday, September 23, 2011

Lost Wax Casting: Koi Cuff Bracelet (final)

Remember that koi cuff bracelet I finished back at the beginning of the year?  Well I had cast it in silver after finishing my final wax model-making course with Pawel so he never got to see the final product.  This month I started the level two course for model-making and brought this bracelet in to show him.  He was pretty impressed with the final product and said it would look even better if I brought out the details using Liver of Sulphur.  It's a strong liquid chemical that coats on clear but turns the silver black in a matter of seconds.  You can then put the bracelet through the polishing wheel once more to remove the black patina from the high points on the surface.  The blackspace and grooves are left dark and definitely highlights all the details from my carving.  I love it!


Sunday, March 06, 2011

Gem Setting

The first-level Gem Setting course was offered at George Brown during the winter term and I took it over seven Saturdays for six hours each day. It was by far the most expensive jewellery course offered at the college and I had to purchase a number of tools that cost extra from the tuition. Overall I was very disappointed with the experience and definitely think that it should have been more hands-on for the 42 hours that were invested in it. Despite that feeling I wanted to post the projects I completed anyway since I've been doing so for all of my other courses. 


The rings we worked with were silver cast rings which were tumbled and had a rough finish.  These were provided to us by the instructor. The course focused strictly on the gem-setting technique and we weren't supposed to "waste time" finishing off the rings but I thought it would actually be a waste not to finish them once the cubic zirconia stones were set (which is the hard part). Since there was extra time during each class I went ahead and filed and polished the first three projects after setting the stone.

1.  Four-Claw Setting
We started with the four-claw setting which taught us to use high-speed steel burs, triangle files, and pumice wheels. It was a little unnerving trying to make bearing cuts into the silver claws to match the shape of the stone and secure it in place. The contact surface was extremely small between the bur and the claws. Several times as the bur was spinning it skid across the claw and nearly wrapped around my thumb - yikes! That would have been messy.


I also had a difficult time getting used to wearing the optivisor and eventually just used the lowest magnification available (1.5x) so that I wouldn't get disoriented every time I looked up from my bench pin to reach for a tool.


2.  Bezel Setting


For our second ring we learned about the bezel setting which I found to be easier than the four-claw. We still needed to use the high-speed steel bur but cutting a groove along the inner wall of the bezel was not nearly as daunting as trying to cut out even grooves in the four separate claws. There was a lot of hammering with this ring to displace the metal along the top of the setting which clamped the stone into place. I didn't mind all of that tapping though, probably because it felt like nothing compared to the intense hammering from my silversmith course with my copper bowls!


3.  Channel Setting
For the channel setting we used 156C Tungsten burs to cut out grooves in the channel wall. The spacing between the teeth of the 156C burs is tighter than the spacing for the high-speed steel ones which makes them less aggressive to use. This ring had only five stones but took me a few hours to set because of my inexperience.

After setting all of the stones into the silver ring by hand, we learned the technique of setting stones into wax. I didn't realized that rings could be cast with stones already in them but we learned that rubies, cubics, and blue sapphires are hard enough to withstand the heat from the casting process. Setting these stones into the wax ring gave us a direct comparison between the two techniques. Hand-setting took several hours (for an amateur like myself)...setting in wax took less than 10 minutes! Unfortunately not every design can be set in wax which is why the skill of gem-setting is still important.

4.  Gypsy or Flush Setting
Our last project was the gypsy setting with 13 small cubics. Needless to say this took some time to complete! Again it took me several hours to set in metal but only 15 minutes to do in wax. I didn't get a chance to polish this ring so it still has the brushed metal finish to it.


After completing this fourth project I do not feel at all prepared to try even a simple setting on my own at home. It's not that I expected to be a master gem-setter after only 6 weeks of courses but I thought the course was poorly taught and poorly organized.  I would not recommend it to anyone (and I'll leave it at that!)

Wednesday, February 02, 2011

Lost Wax Casting: Koi Cuff Bracelet (cont'd)

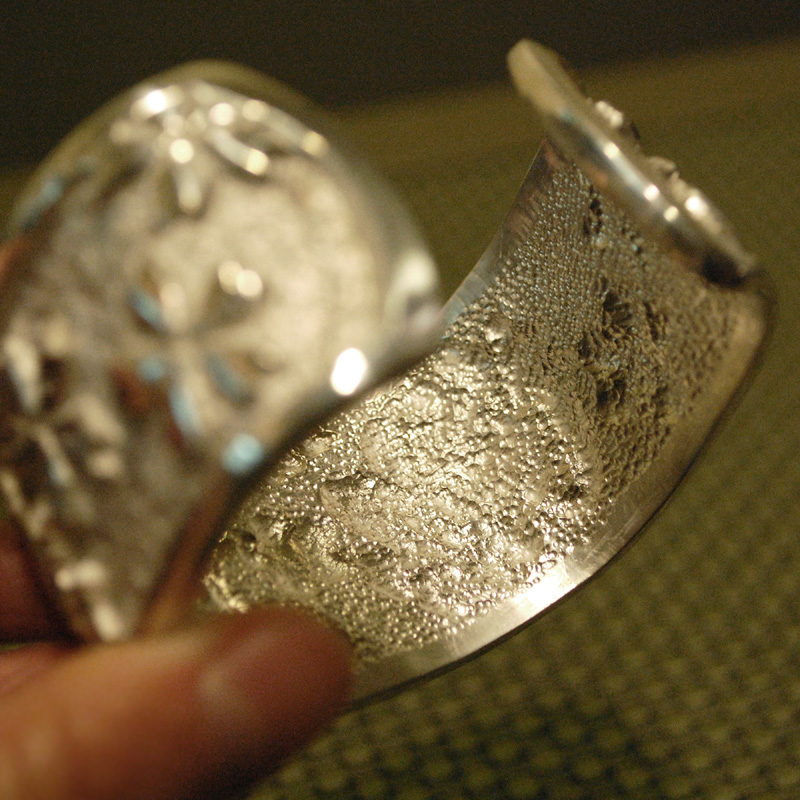
Here is my finished bracelet after polishing with Tripoli.   I'm really proud of this bracelet which probably took around 30 hours to carve in wax and another 4 hours to finish in metal.  Too bad it's quite heavy and not at all comfortable to wear!  It looks great on my jewellery stand though and turned out better than I ever would have thought.  I will just have to make my second bracelet even better (after a little break in between, of course).


Thursday, January 13, 2011

Lost Wax Casting: Koi Cuff Bracelet (cont'd)

I was able to cast my koi cuff braclet in sterling silver this week - how exciting! In my previous class I soldered a massive sprue at the base of the bracelet and then set the mold. I ended up keeping most of the bridge as support so there will be a considerable amount of silver I can recover from this casting. One of my classmates took a final photo of the wax piece just before I said goodbye to it for good.

Preparing the piece for casting
 There was a fair bit of prep before the actual casting process took place. I had a bar of fine silver that had to be cut with copper to make sterling silver which is harder and more durable. It took a painfully long time to melt down such a large amount of silver and my hand was pretty crisp from holding the torch.

Here I am with my instructor Shao getting ready to melt the sterling silver beads with the torch.  In the right photo I'm adjusting the flame before pointing it down into the centrifuge.


After the piece was cast I had to wait another 20 minutes for it to cool down before plunging it in a bucket of water and retrieving the bracelet. That felt like a verrrry long 20 minutes.  Here is the bracelet with the massive sprue sawed off (which took an hour with a tiny jewellery's hand saw!).

Bracelet just after casting (fine silver coating)


Thursday, January 06, 2011

Lost Wax Casting: Koi Cuff Bracelet (cont'd)

I was able to dedicate a lot of carving time to this bracelet over the holiday season (I love that my office shuts down for Christmas!).  The bracelet is coming along nicely and I've spent many hours carving, digging, and scraping away wax.  I'm still pretty timid with the tools so I end up making multiple passes over the entire bracelet, slightly deepening the grooves each time.  Not very efficient but I'm getting good practice, that's for sure.
The right-side koi is beginning to take shape

Another 3 hours spent adding details such as scales and fins

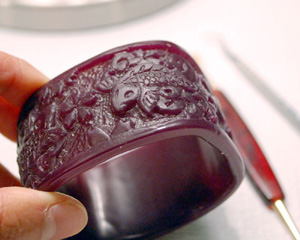
The wax model is almost ready for casting. I've spent a considerable amount of time hollowing it out and taking down the thinnest sections of the bracelet to about 1.2 - 1.5 mm. Before the holidays the wax model weighed 33 grams. Now it weighs 15 grams, and will be even lighter once I cut out the bridge and create the opening in the bracelet for my wrist. The weight in sterling silver is approximately 10.4 x the weight in wax so there is definite incentive to get this piece lighter.


In the right-hand photo you can see the neat texture that my instructor suggested I add to the inside of the bracelet. It took about 45 minutes just to do that detail alone but it really gives the bracelet a nice finished look without requiring me to file the finished piece from the inside.


Saturday, December 18, 2010

Lost Wax Casting: Koi Cuff Bracelet


In my model-making class last week I started a cuff bracelet which will probably take me into the new year. This project will give me something to do during the Christmas break when we're off for a few weeks. I was inspired by a design I saw online here. Pretty ambitious I know, but hey it's something to strive for.

After sawing out a thick block of wax for the cuff bracelet I used the drill press to take out the middle section. I drilled a series of holes around the inner diameter and then cut through the remaining bits of wax with a regular jewellery's saw frame. Then it was time to file, file, file!

For now I'm keeping the cuff quite thick to provide support until all of the design has been carved into the front.  After that it can be hollowed out from the inside to reduce the cost and weight of casting.

Design for new bracelet
Here is the design I plan to use for the bracelet.  I found a nice stencil for a single koi online so I simply mirrored the image and added some more flowers as filler. I sized the design for my bracelet, printed it, and  taped it to the wax cuff for transfering. Using a pin I transferred most of the design onto the wax, leaving out the more intricate details such as the fish scales and the smaller flowers. This took about an hour.


Design transferred to wax using pin-pricks

It took me about 3 hours with the flex-shaft and a set of burs to create a sunken relief for the blackspace in my bracelet (I was way too timid with the burs). The instructor thought this project would take 40 - 50 hours to complete - so far I've put in 7 hours. I'll have to decide just how much fine detail I want in this bracelet but ultimately the plan is to have it ready for casting in January before my courses end.

Tuesday, December 07, 2010

Lost Wax Casting: Dragonfly Pendant


For my next pendant project I decided to try a dragonfly and aimed to make it thinner and lighter than the swan.  I started with a 2mm-thick piece of wax and filed it down to 1.7mm.  Then I used needle files to start forming the overall shape of the dragonfly and borrowed a graver from the instructor to do the grooves in between the wings and beads of the body.


Here it is after I finished casting it in sterling silver.  Again the white colour is from the fine silver which  hasn't been polished off yet.  I made a rubber mold of this pendant after soldering on jump rings and polishing it down a bit.  This time it was alot more difficult to cut the two halves apart in the same plane where the pendant was because the dragonfly is much thinner than the previous swan pendant!


I ended up giving this necklace to my friend and then cast one of the blue duplicates for myself.  I tried finishing the pendants with the polishing wheel to get a high-shine coating but was unsuccessful.  Because the pendant is so thin it heated up very quickly with friction.  This softened the metal (making it easy to bend) and meant it was very difficult  to hold onto the pieces for more than a second or two at a time - hot hot hot!  Eventually I settled for using a tiny polishing wheel with my handpiece.  It couldn't do the job as well as a polishing wheel but saved me from getting any more burns on my fingers!

Wednesday, November 24, 2010

Cloisonne Pendant (cont'd)

Progressing slowly on the pendant. For the background I wet-packed two layers of Grass Green for shadowing and then added a layer of Peppermint Green which needs a second or third coating. The butterfly wings have two layers of Rose Pink but the colour isn't as bright as I expected. I also added a layer of Perriwinkle in the tips of the wings but after firing it seems to have blended with the pink. The body has an opaque yellow until I can think of what else to do with it.

Pendant after two layers
Almost done. I wet-packed several more layers into the cloisonne and the colours are becoming more vibrant. The cloisonne was beginning to curve from all of the firings so the instructor helped me flatten the piece by heating it up and then smashing it flat between two heavy metal plates immediately after removing it from the kiln. It didn't seem like a very sophisticated technique but was very effective. I was skeptical that the enamel wouldn't just crack off. In fact, it would have if we had smashed it even 5 seconds later and the piece had cooled down too much. 


After the cloisonne was flat it was easy to stone, which involves scrubbing it under running water with a piece of carborundum (silicon carbide). This removed excess enamel that was covering the cloisonne wire so now the butterfly outline looks like it is glowing. The cloisonne will undergo one last firing to maturity next week.