Sunday, November 25, 2012

Deep in Thought

32 week ultrasound - baby's face
Wow, has it really been a month since my last post?  Time is flying by!  This past week I had my 32-week ultrasound and the baby is still head down which is a good sign.  He seems to have been head down since 26 weeks or so - eager little fella, I'd say.

This is the fourth ultrasound I've had and everything is checking out just fine.  The reason why I'm having additional ultrasounds past the 20-week mark is because there are only two vessel cords in the umbilical cord instead of the usual three.  Typically there are 2 arteries and 1 vein through the umbilical cord but we've only got one of each.  Apparently it happens in about 1% of pregnancies and of course, we're part of that 1%.  Go figure.  


Anyway this condition is sometimes indicative of much more serious problems but they've already ruled out all of the scary stuff so now it's just a matter of birth weight.  These extra ultrasounds are meant to check his growth and make sure he's getting enough nutrients from mama since a low birth weight can be common.  I think from the chubby cheeks in the ultrasound pic he's doing just fine :)

I included the same pic below where I've pointed out the features of the baby's face since I know it can be hard to figure out what the heck you're looking at.  Mike saw it right away but I was sure confused when I first saw the photo.  Some people said he kinda looks like this dude here.
The Thinker
My next ultrasound is at 36 weeks so it will be exciting to see how much he'll have grown over the next  month.  His bum is already constantly pushing out into my rib cage or into my stomach and I have to give it a pat so he tucks it back in.  Still getting used to the weirdness of it all.  

In the meantime my brother and his wife are anxiously awaiting their turn, as Freda's official due date has now come and gone.  I'm going to be an aunt in just a matter of days - can't wait!

32 weeks 3 days

Monday, October 29, 2012

Frankenstorm Pumpkin

Mike started it off while I cooked dinner
Hooray for owning a house  and having an excuse to carve a pumpkin!  We lived in a condo for years and kids were never allowed to go trick-or-treating around the units. They had candy in the party room I think.  There was never any point to carving a pumpkin since there was nowhere to display one.  I haven't carved a pumpkin in so many years - that's why I was really looking forward to doing it tonight.  We actually bought our pumpkin weeks ago (that's how excited we were) but had it sitting out on the porch uncarved until today.

On the weekend we chose a stencil that we liked - not too complicated for rusty pumpkin-carvers like ourselves.  I know I know, it's cheating to use a stencil but hey, we wanted it to look nice!

Tonight we were late getting home from work, and luckily the Frankenstorm wasn't upon us yet or else traffic could have been much worse.


I took over while Mike baked muffins!

Mike started on hollowing out the pumpkin while I made dinner.  Then afterwards we swapped - I transferred the stencil onto the pumpkin while he made good use of our over-ripe bananas and made his famous banana-walnut muffins.

Then we both got serious, each taking on half of the pumpkin face.  I got some use out of the wax carving tools from my jewellery classes last year, digging into the small corners of the face.

This is what Mike looks like when he concentrates

Success!

Sometimes intensity can look like confusion

My eyebrows look wild here - kind of like the pumpkin

The muffins were so distracting...


Trick or Treat!

Saturday, October 27, 2012

Maternity Tunic

For my birthday this past summer, when I was just coming out with the news of my pregnancy, I received a maternity blouse from one of my good friends.  Lately as the weather is getting much cooler I'm finding it a challenge to get by on the few articles of maternity clothing I own.  I really don't enjoy the maternity jeans I bought (maybe because they were a relatively cheap pair from Old Navy) or the skinnier jeggings type that my cousin lent me because they both seem to keep riding down on the hips rather than stay snugly in place.  I've decided to try and get by for the remainder of my pregnancy mostly with tights, leggings, and skirts.  The problem with tights is that I need longer tops to make the outfit decent for the office (even though our dress code is pretty relaxed and I'm sure they'd make exceptions for my situation).

Anyway one of the things I've been doing is looking at which of my tops could be lengthened to wear as a tunic with tights.  One that came to mind was the blouse I got for my birthday. I forgot to take photos of the blouse before making modifications but it's pretty easy to imagine - everything grey was part of the original blouse and everything blue is new!


When I was at Fabricland last week looking (unsuccessfully) for a nice cotton out of which to make our baby's chenille blanket I did come across this light faux-denim trim which was on sale - 4m for the price of 1m!  I didn't know what I wanted to make with it but I thought it would come in handy.  That was exactly the case in transforming this blouse into a tunic.


Ideally I would have had four rows of trim along the bottom of the shirt just to get a bit more length but I didn't have quite enough so I stuck with three, then used the remainder to add some details around the front collar.


Ta-dah!  Pretty cute tunic right? And now I can wear it with tights and boots.  Ok, back to my sewing-on-hold rule.  This will be tough since my Peekaboo Partridge fabric just arrived in the mail yesterday, and today at Ikea I bought really pretty matching fabric to make curtains out of in the baby's room!

Accessorizing for Winter!

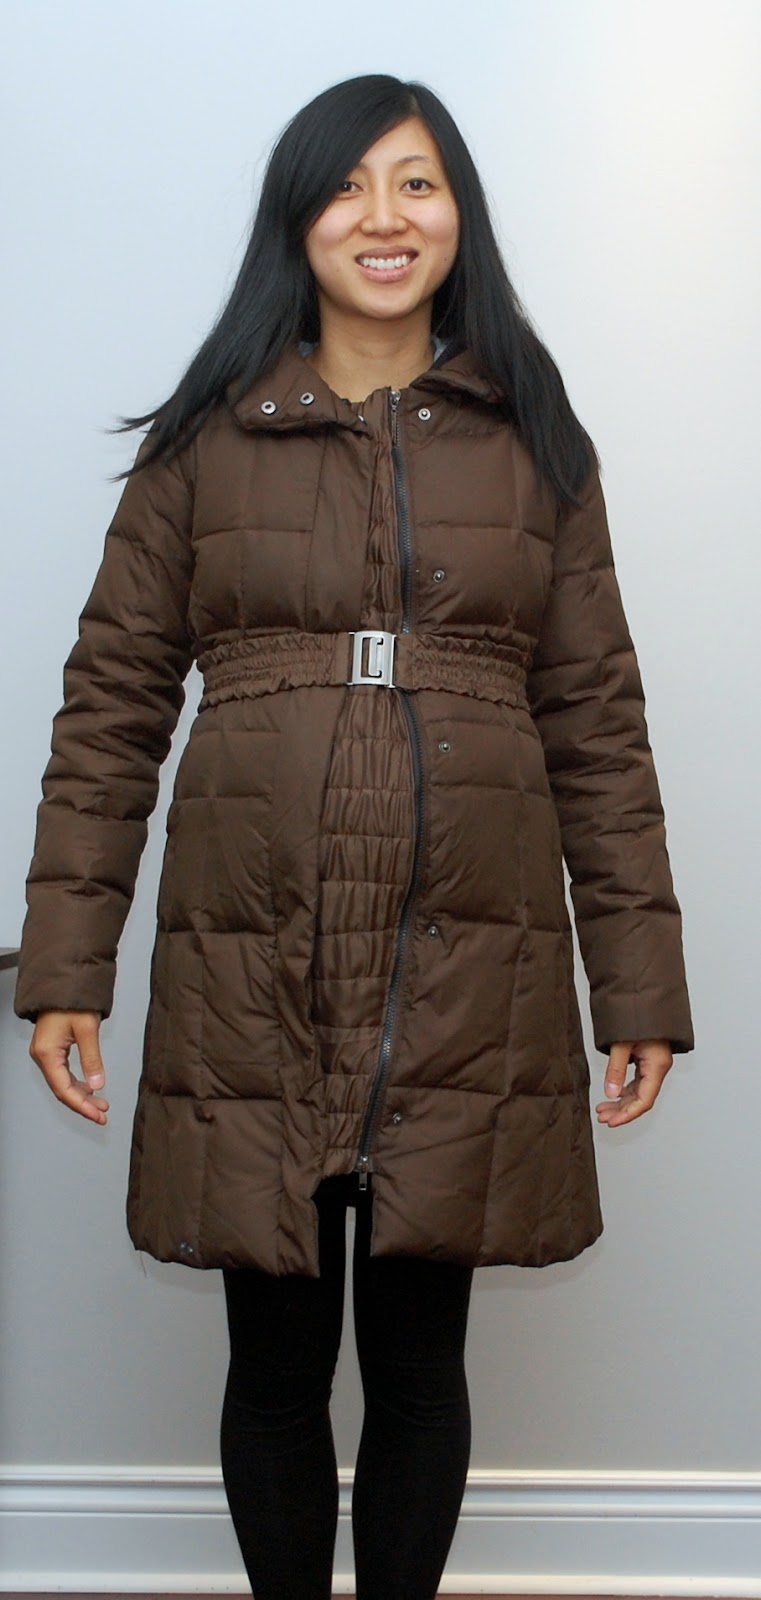
Remember the expansion panel that I made last month for my black zippie? Well two weeks ago on my way down to my sister-in-law's baby shower I swung by the Leather and Sewing Supply Depot to have them match zippers for three other articles of clothing: 1 puffy vest, 1 ski jacket, and 1 down-filled winter coat.  The little European woman recognized me from before and asked how the pregnancy was going :)

The service I got was amazing. She was able to match all three zippers and customized the length of each zipper from ones that were originally too long.  She was very fast and efficient, and in the end the total cost of the zippers plus her service was $10.  Fantastic.  Here are the Before and After shots of my winter coat, which is by far the warmest coat I own.  

Before
After
Incredibly, when I was sewing this panel two weeks ago I had no trouble zipping up the front but clearly Baby has had a growth spurt.  I used the same black ribbed fabric from my zippie but covered it in a brown satin fabric to match the coat.  I also sewed a bunch of horizontal lines into the panel to give it a quilted look similar to the coat.


Here's a belt that I had sewn last year to try and make this coat (which I've had since university!) a little more trendy and figure-flattering.  Funny how last year I was tapering the coat in at the waist, and this year I'm doing the complete opposite! Anyway it still works with the expansion panel and at least gives me a little bit of a figure....well....maybe from the profile.  Okay Winter, bring it on!


custom belt and expansion panel

Tuesday, October 23, 2012

Third Trimester...Sewing on Hold?


This week I begin my third trimester!  The baby is definitely active and I've been amused by the rolling motion that my belly occasionally takes on. In fact, last night I was lying on the couch reading with a book resting on my tummy but couldn't stay focused because every few minutes the pages of the book would flutter around as the baby moved.  I found it pretty funny.


My pregnancy is going well so far, nothing I can really complain about.   I started going to prenatal yoga classes at YogaSpace on Ossington near Dundas which is where my sister-in-law goes.  There's a regular Vinyasa class at the same time as my prenatal class on weekends so Mike can attend that with my brother while I'm in prenatal with my sister-in-law.  Works out pretty well.  I am experiencing some common discomforts but I know of many people who have had a much harder pregnancy so I'm mostly content. The more annoying symptoms are those related to the cold I've had for the past 2 1/2 weeks.  Being completely congested at night, and plagued by an insufferable cough, has made sleeping a struggle.  I have my fingers crossed that it's finally starting to turn around!

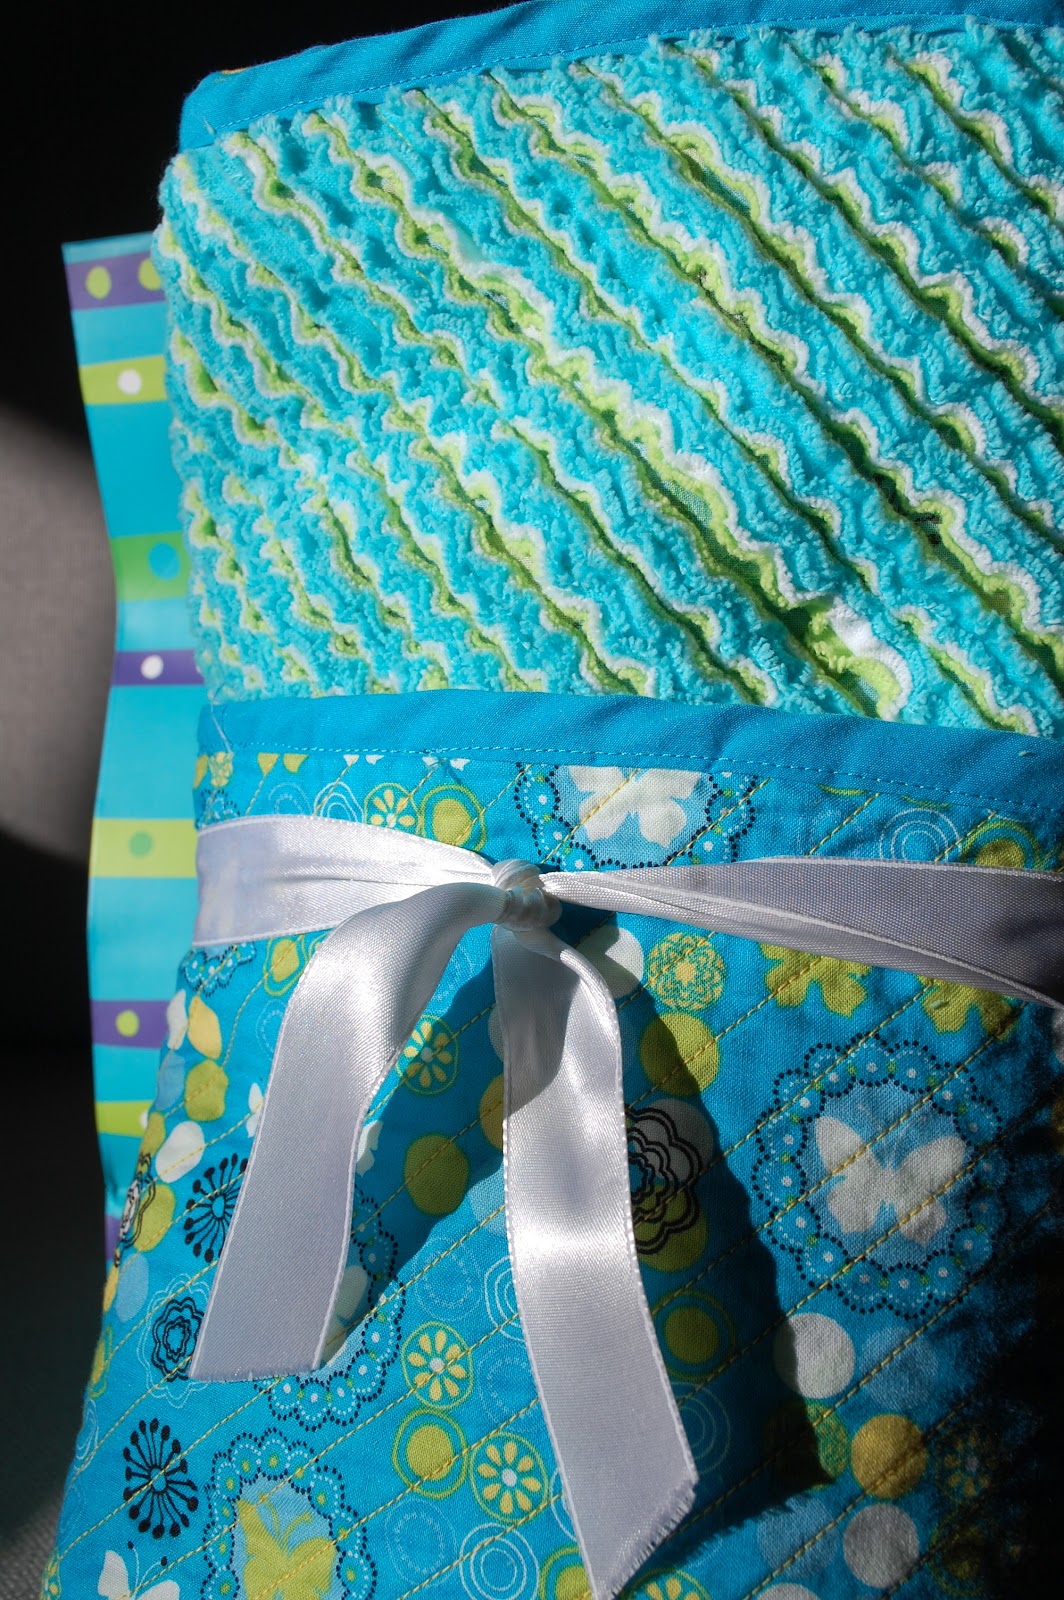
My sister-in-law had her baby shower last weekend and I brought the chenille blanket to the party.  Can you believe that I was able to find the absolute perfect gift bag to go along with the blanket? I mean seriously, I couldn't have asked for anything better...and even more incredible was that this bag was already lying around in my stash of gift-wrapping stuff.  Next time I tell myself I should really stop hoarding used ribbons, wrapping paper, gift bags, and the like, I will remind myself of this awesome find.  

Blue Butterfly Chenille Blanket


I am looking forward to sewing a similar chenille blanket for our little baby boy over the Christmas holidays.  After poring over the quilting fabrics at Fabricland (where I bought the blue butterfly) and deciding they were too girly (but beautiful) for this new project, I settled on a nice collection from a seller off of Etsy. Apparently this collection, called Peekaboo Partridge in Green by Thomas Knauer, was popular last year and the seller was having a huge sale last week to get rid of the remaining scraps.  That meant I couldn't get a full yard of any one of the fabrics I liked but managed to buy a combination of three from the collection to make up a full blanket.  I really like the avocado and canary yellow colours and think they'll be perfect for a baby boy (or girl, for that matter).  Every day I'm excited to see if they've arrived in the mail...it's been 7 days!

Unfortunately I won't be starting the blanket any time soon - I'm trying to stay focused (with much difficulty) on studying for the Professional Practice Exam for my P.Eng license (ugh, don't ask).  BUT...you can bet that at 5:01pm on December 8th, as I put down my pen and close my exam booklet, images of yellow partridges will be dancing through my head :)

Peekaboo Partridge
Nest Egg
Happy Scrolls

Monday, October 08, 2012

Cushions and Custom Front Door Rug


Shortly after we moved into our house in the spring I decided to make new throw cushions for the sofa.  I got tired of the yellow ones that I made while we were still in the condo - they just didn't pop out the way I wanted them to.  

We were out at Ikea looking for a simple dresser for the bedroom and when we got to the fabrics section this greyish brown fabric caught my eye.  I was surprised at the nice selection of fabric they have at Ikea, and the fact that it's good quality heavy fabrics for only $7.99 per yard (or was it per meter?).  Anyway they had really lovely florals in bright colours but I didn't want the cushions to be too feminine so this is the one I went with.  I made simple cushions with a navy blue side zipper so that the covers could be removed and washed.


This long weekend I got around to finishing a matching custom rug for the front entrance. I had cut out the shape for the rug about three weeks back but then got side-tracked with several baby sewing projects.  Yesterday I wanted to add some wide binding to finish up the edges and looked around for potential candidates from my scrap fabric box.  That's when I came across the Ikea fabric I had used for our cushions!  I thought it would be pretty neat to have a front hall rug that matched our cushions.  

As you can see from the photo below the rug is a pretty irregular shape.  I opted to do this rather than a simple rectangular rug because I wanted the custom fit to keep the floors clean and hoped that the cutouts would also help keep the rug in place.  The rug is made of pretty thick fabric but not quite as thick as typical front hall rugs so we're going to pick up some carpet underpadding to place beneath it.  That will give it a cushier feel and still allow me to throw this into the wash every now and then.


Tuesday, October 02, 2012

Blue Butterfly Chenille Blanket

I just finished sewing my first chenille blanket and I'm just thrilled with how it turned out.  My brother and his wife are expecting a baby girl next month and I wanted to make something in time for the baby shower coming up shortly.  


At one point I considered attempting a quilt which I've never tried before but then I found a blog about the faux chenille blanket and I was hooked.  Here is the beautiful blanket from Anneliese's blog "Aesthetic Nest" that inspired me to make one for my sister-in-law.

At Fabricland I had a hard time choosing between two beautiful patterns for the top layer. One was similar to the blog, peachy-pink in colour and quite girly which is perfect since my brother is expecting a girl.  But then I also found a vibrant blue fabric along with the matching cotton flannels.  In the end I chose to go with blue since it was very pretty but not overwhelmingly feminine.  I expect there may already be too much pink coming their way at the baby shower.  Altogether there are three layers of flannels - blue, white, and greenish-yellow.


I began the project with sufficient warning from the blog that sewing lines for hours would be a tedious task but I was prepared to go for it.  Here I am still fresh after sewing only 3 measly lines through the blanket.


I basically followed the instructions laid out in the blog so I don't need to repeat any steps here. I must be a much slower sewer than Anneliese because the process of sewing straight lines took me closer to 7 hours than 4-5.  I guess I was just being overly cautious in the beginning and really took my time. Eventually I got better (or less patient) so the sewing ramped up over time.  I can't say the lines are all that even or parallel but if you look at the blanket as a whole, it's not obvious.

Lines complete after 7 hours
Back side of blanket
At the very least there was almost no cutting during the prep stage and that had its benefits over a quilt.   I probably wouldn't mind fabric cutting as much if I had a proper rotary cutter and mat but so far I've been getting by pretty decently with just a handy pair of scissors.  For this project though I decided to expand my tool set and ordered the Olfa chenille cutter that Anneliese mentions in her blog.  It definitely saved me time and effort!
Chenille cutter with 4 settings

I was a little nervous throwing the whole blanket into the wash after completing my hours of sewing since I had not pre-washed any of the fabrics.  I chose a gentle cycle with cold water and then tossed it in the dryer on the low heat setting.  When the dryer buzzer rang out I was delighted to see how nicely the whole thing had fluffed up!  You should have seen how much fuzz was in the fuzz catcher!


I definitely plan on making another chenille blanket for our own little one, possibly over Christmas time.  It's a simple enough project as long as you have the patience, and it produces fantastic results!  I ended up using two full spools of golden thread...400m of thread total! Now that's allota lines!

Sunday, September 30, 2012

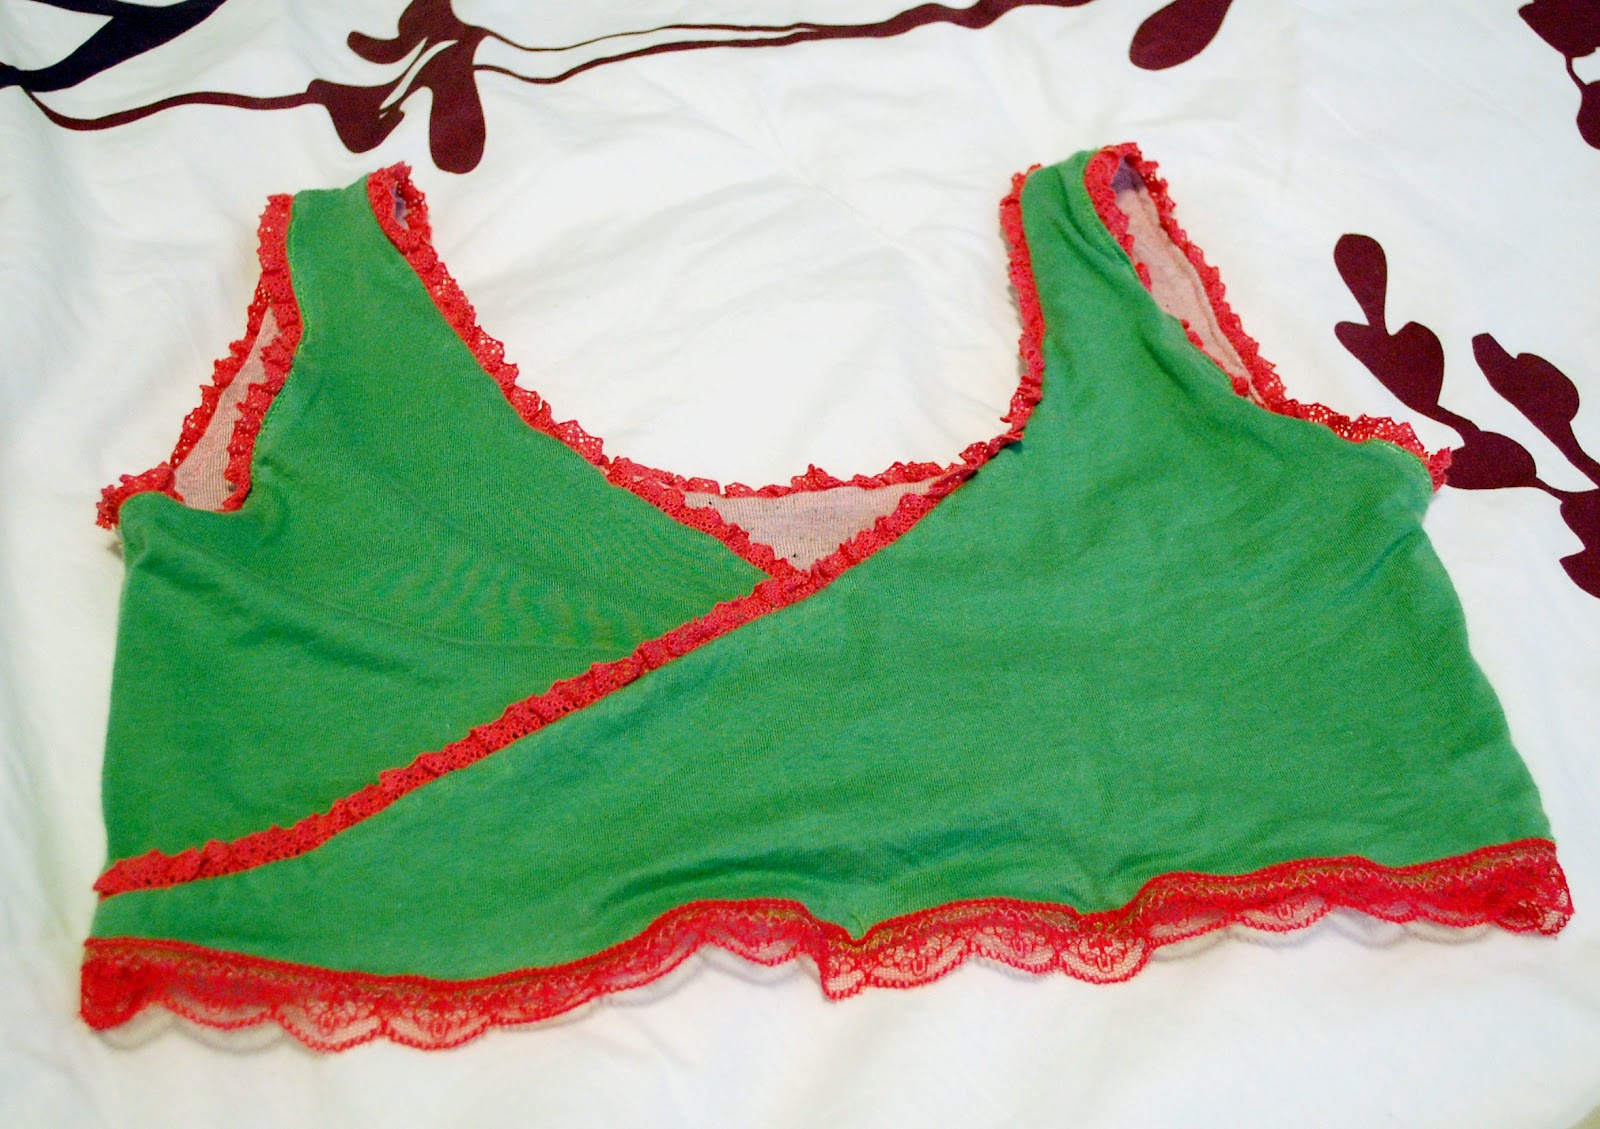
Mamma-Baby Nursing & Bloomers Set

My good friend was expecting her second baby any day but never found out the sex of the baby so I had a bit of a challenge figuring out what to make for her. Weeks ago I had ordered an adorable crochet sock monkey hat & diaper cover set that I found on Etsy and thought that would make a great little gift for a boy or girl, plus Halloween *is* just around the corner!  I love this photo from the Etsy website!

Sock Monkey Set from Treasured Creation
Still, I wanted to make something for my friend as well and it occurred to me that she had been looking around for a comfortable bedtime nursing bra, one without complicated clips and straps.  Well, I thought, that might be an interesting little sewing project and decided to go in search of some pretty but comfortable fabric.

And so began my first real project with knitted fabric.  It was quite frustrating at times.  I read online that you should never use a straight stitch on knits because the thread will just break when the fabric tries to stretch out. Instead there's an overlock stitch or a stretch stitch that most new machines have.  Of course, with my Singer Featherweight I have limited options so the best I could do was use my zig-zagger attachment (recall the stapler-sized attachment I have which moves the fabric side-to-side to compensate for a machine that can only do a straight stitch).  

Reversible top
The thing I like about my zig-zagger is that it is COOL.  I think it is so clever how these mechanical attachments work and allow the Featherweight to do so many of the things that a modern machine can do.  The disadvantage is that for certain light fabrics (or stretchy, in this case), the zig-zag stitches come out pretty uneven because the fabric doesn't clamp very well, making the side-to-side movements quite inconsistent.  

Reversible top
Since I knew I wouldn't be doing a terribly nice job of finishing the edges I decided to make this a reversible bra to hide all seams and then added some cute pink elastic lace trim for accents.  Originally I sewed in a cream-coloured elastic along the bust line but the results were pretty horrendous as the fabric flared out in bizarre ways.  Finally I gave up, ripped out the elastic, and replaced it with wider pink lace instead.


My friend's baby came two weeks early and we found out that it was a healthy, beautiful baby girl. Perfect, I thought! I decided to whip together a matching pair of bloomers with the fabric left over from the nursing bra, which is what you see below.  After first cutting out the pattern for the bloomers I thought they looked quite huge and wondered if my friend would know it was for the baby and not herself!  Luckily after putting in the elastics the bloomers shrunk down to a reasonable size and there could be no mistake that these were for the baby :P

Monday, September 24, 2012

Spool Organizer

Here is my new spool organizer that I also happened to finish this weekend (yay for weekends!).  I got tired of digging through various different plastic containers trying to remember where I stored a certain colour spool of thread or trying to find the matching bobbin.


I started with the following raw materials (mostly bought at Michael's):

- one 12" x 24" piece of plywood
- two 1/8" diameter wooden rods to be chopped down into 2.5" long dowels
- random rectangular wooden pieces
- two strips of magnets
- a little birdie tree ornament on sale for $1.50 that caught my eye while I was in line to pay
- fabric
- glue
- ribbon

My friend Rick helped me drill the holes for the dowels since I wanted all the holes at the same angle (approx. 30 deg. from horizontal) and didn't trust myself to do that consistently.  He machined a little plastic guide that he used to align his drill to and look how neatly all of those dowels stand up!

I originally planned to paint the left half of the piece of plywood but later opted for fabric because I liked the texture.  I left the right half of the board free of holes so I could sew in pockets for my other sewing accessories.


I upholstered the right half of the board with the same colourful fabric that I used for Mya Ella's Dress (isn't it cheerful?).  To give it a softer feel I included one layer of batting between the wood board and the cloth, and also behind each of the pockets.  Then I sewed some simple white ribbon/binding to act as a divider between tools and to join up the left and right halves of the board.


Next I glued on the rectangular wooden pieces right over the cloth and added the magnets for holding my bobbins. In retrospect I should have probably nailed the rectangular pieces into the board so that they would be more secure but I was afraid the strips of wood were too flimsy and might split on me. Besides glue is just easier!

Finally the finishing touch - the birdie ornament not only had the right "hand-made" feel to it but it was perfect for a pin cushion. Now I just need to hang this up on the wall above my sewing table and I'll be set!