Above you can see the two strips of 18k gold that we transformed into our wedding bands. In the top right photo is the cozy studio where we spent the afternoon. Below I'm sawing the strip of gold down to the right length for my ring. Next came filing and sanding the edges to make them nice and square.
 |


We used a raw hide mallet and ring mandrel to pound the metal into shape. This was a cute photo that the owner of the studio took.
Using ring-bending pliers (round on one half and flat on the other) we brought the ends of the ring together to form a tight fit. Here's where we got to see just how good a job we had done squaring off the ends of the gold strips. To properly solder the ring together it was crucial that the ends butted up against each other without gaps.
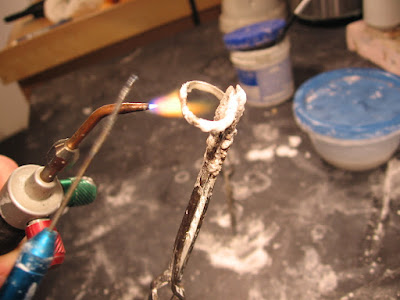
Here Mike is soldering his ring together. Prior to applying heat the ring was dipped in flux to clean the metal's surface. The flame caused the flux to bubble and dry up which is why it looks coated in white foam.
Then it was my turn to work the flame...
Once the rings were soldered and cleaned we spent a considerable amount of time pounding the rings on the mandrels to shape them into perfect circles. Next came polishing with emery paper for what felt like most of the afternoon. It was the most tedious portion of the workshop, and pretty exhausting on the hands and arms, but it was necessary to eliminate the larger scratches before the final polishing step (shown below).
 |
| Using the polishing wheel to bring out the shine! |


No comments:
Post a Comment