Sunday, September 30, 2012

Mamma-Baby Nursing & Bloomers Set

My good friend was expecting her second baby any day but never found out the sex of the baby so I had a bit of a challenge figuring out what to make for her. Weeks ago I had ordered an adorable crochet sock monkey hat & diaper cover set that I found on Etsy and thought that would make a great little gift for a boy or girl, plus Halloween *is* just around the corner!  I love this photo from the Etsy website!

Sock Monkey Set from Treasured Creation
Still, I wanted to make something for my friend as well and it occurred to me that she had been looking around for a comfortable bedtime nursing bra, one without complicated clips and straps.  Well, I thought, that might be an interesting little sewing project and decided to go in search of some pretty but comfortable fabric.

And so began my first real project with knitted fabric.  It was quite frustrating at times.  I read online that you should never use a straight stitch on knits because the thread will just break when the fabric tries to stretch out. Instead there's an overlock stitch or a stretch stitch that most new machines have.  Of course, with my Singer Featherweight I have limited options so the best I could do was use my zig-zagger attachment (recall the stapler-sized attachment I have which moves the fabric side-to-side to compensate for a machine that can only do a straight stitch).  
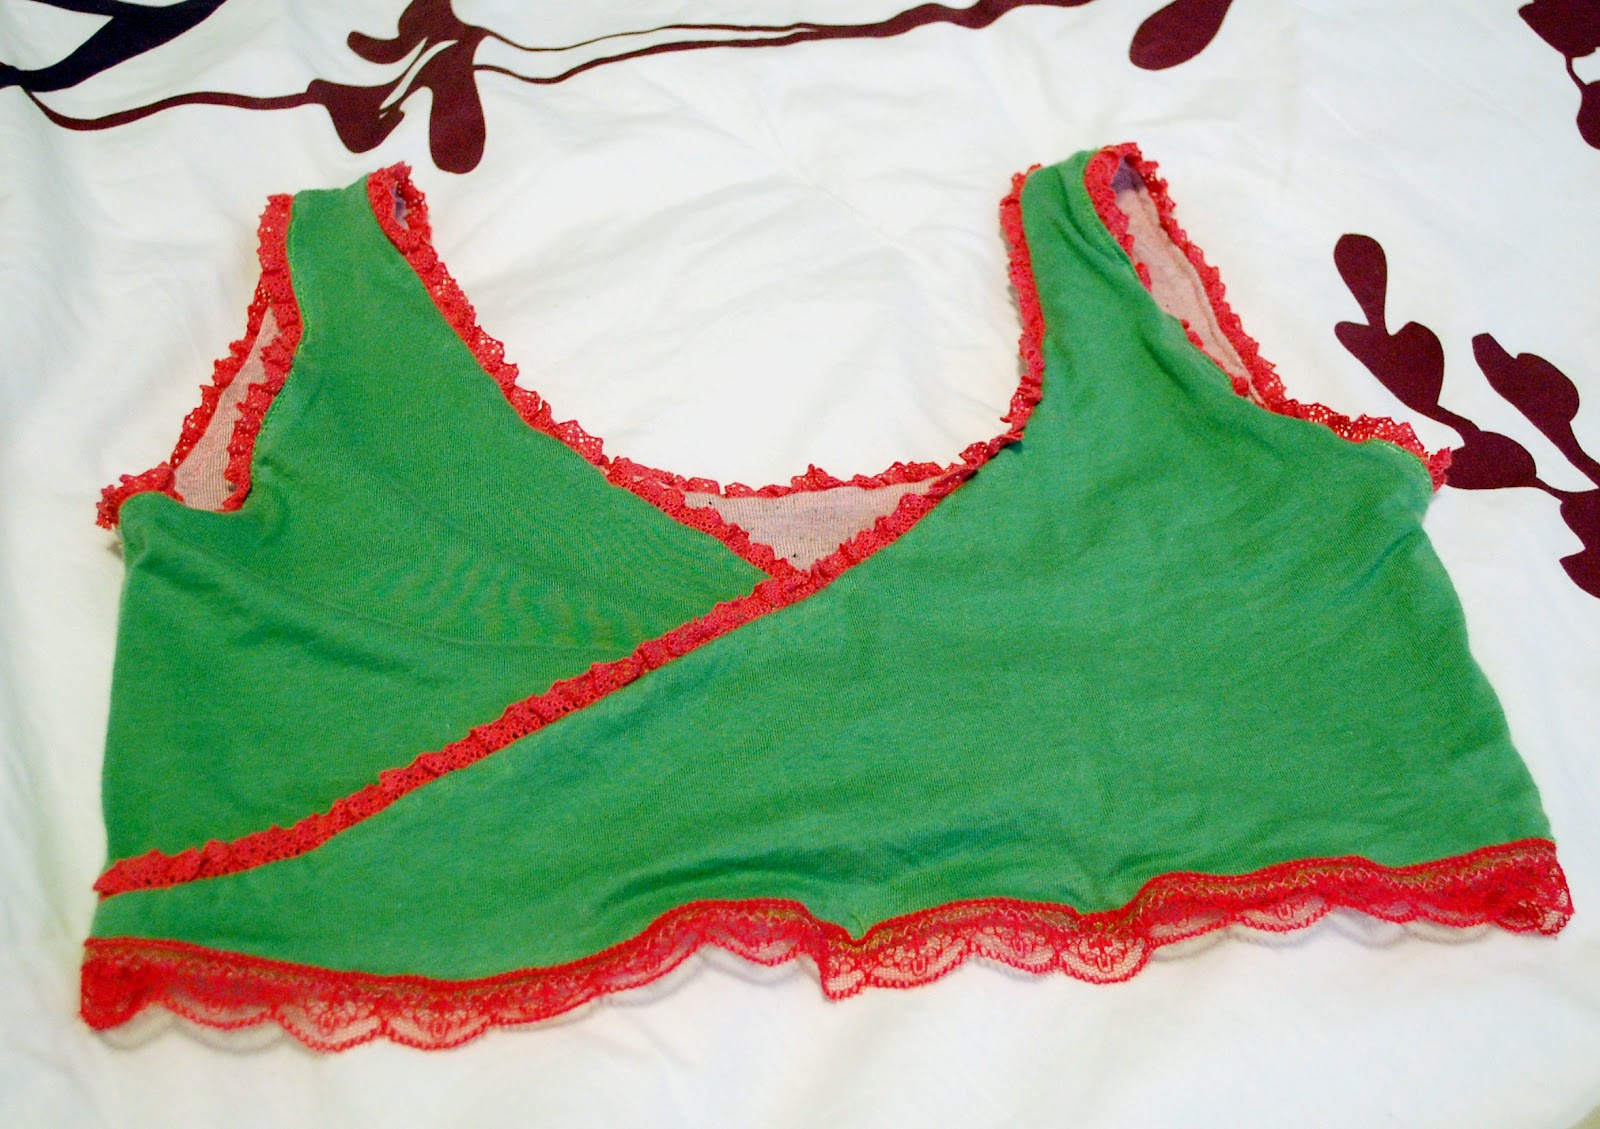
Reversible top
The thing I like about my zig-zagger is that it is COOL.  I think it is so clever how these mechanical attachments work and allow the Featherweight to do so many of the things that a modern machine can do.  The disadvantage is that for certain light fabrics (or stretchy, in this case), the zig-zag stitches come out pretty uneven because the fabric doesn't clamp very well, making the side-to-side movements quite inconsistent.  

Reversible top
Since I knew I wouldn't be doing a terribly nice job of finishing the edges I decided to make this a reversible bra to hide all seams and then added some cute pink elastic lace trim for accents.  Originally I sewed in a cream-coloured elastic along the bust line but the results were pretty horrendous as the fabric flared out in bizarre ways.  Finally I gave up, ripped out the elastic, and replaced it with wider pink lace instead.


My friend's baby came two weeks early and we found out that it was a healthy, beautiful baby girl. Perfect, I thought! I decided to whip together a matching pair of bloomers with the fabric left over from the nursing bra, which is what you see below.  After first cutting out the pattern for the bloomers I thought they looked quite huge and wondered if my friend would know it was for the baby and not herself!  Luckily after putting in the elastics the bloomers shrunk down to a reasonable size and there could be no mistake that these were for the baby :P

Monday, September 24, 2012

Spool Organizer

Here is my new spool organizer that I also happened to finish this weekend (yay for weekends!).  I got tired of digging through various different plastic containers trying to remember where I stored a certain colour spool of thread or trying to find the matching bobbin.


I started with the following raw materials (mostly bought at Michael's):

- one 12" x 24" piece of plywood
- two 1/8" diameter wooden rods to be chopped down into 2.5" long dowels
- random rectangular wooden pieces
- two strips of magnets
- a little birdie tree ornament on sale for $1.50 that caught my eye while I was in line to pay
- fabric
- glue
- ribbon

My friend Rick helped me drill the holes for the dowels since I wanted all the holes at the same angle (approx. 30 deg. from horizontal) and didn't trust myself to do that consistently.  He machined a little plastic guide that he used to align his drill to and look how neatly all of those dowels stand up!

I originally planned to paint the left half of the piece of plywood but later opted for fabric because I liked the texture.  I left the right half of the board free of holes so I could sew in pockets for my other sewing accessories.


I upholstered the right half of the board with the same colourful fabric that I used for Mya Ella's Dress (isn't it cheerful?).  To give it a softer feel I included one layer of batting between the wood board and the cloth, and also behind each of the pockets.  Then I sewed some simple white ribbon/binding to act as a divider between tools and to join up the left and right halves of the board.


Next I glued on the rectangular wooden pieces right over the cloth and added the magnets for holding my bobbins. In retrospect I should have probably nailed the rectangular pieces into the board so that they would be more secure but I was afraid the strips of wood were too flimsy and might split on me. Besides glue is just easier!

Finally the finishing touch - the birdie ornament not only had the right "hand-made" feel to it but it was perfect for a pin cushion. Now I just need to hang this up on the wall above my sewing table and I'll be set!


Expansion Panels!


Expansion panels are a pregnant girl's best friend.  I was first introduced to the idea last winter when I saw Kelly (from done-well) shortly after she had her beautiful bouncing baby girl.  Kelly's winter coat had a colourful panel that zipped in perfectly to her existing front zipper, and the panel had pleats allowing it to grow or shrink with her pre- and post-pregnant belly.  I thought it was genius and knew I would definitely copy that idea if I ever needed to.  Sure enough, Baby Boy is due in January and now I have a great excuse to make expansion panels!

Pinning the zipper to the panel

The panel I made this weekend is a very basic plain one to match a black zippie that is perfect for this fall weather.  On Saturday I headed down to Queen St. and found the store that Kelly had suggested for matching zippers. I can't believe in all the times I've gone to my regular fabric stores along Queen St. I didn't know of the Leather & Sewing Supply Depot.  It's actually just off of Queen St. on Vanauley St. two blocks west of Spadina (right by EuroFab).  There's a small yellow sign outside and you have to go downstairs to the store which has a very industrial feel to it.  They have a wonderful selection of zippers, fabrics, embellishments, and tools.  The little European woman who worked there found me a matching 25" zipper within 5 minutes - amazing.

I chose a stretchy ribbed heavy cotton for the panel that matches the waistband part of the zippie.  I originally thought of making the panel colourful so it would stand out but there wasn't a whole lot of selection in colours for that type of ribbed cotton so I defaulted to simple black.  When I got home I went straight to work. 


The sewing part was surprisingly straightforward and before I knew it my dilemma of the exposed belly was resolved.  I have a brown down-filled winter coat that is very warm and I fully intend on making an expansion panel for that so I can go on some winter walks when to keep from going stir-crazy once the baby has arrived. I don't know if there are already places out there that specialize in custom expansion panels but if not, there definitely should be! Thanks Kelly!

Thursday, September 13, 2012

Embracing the Belly


I think this photo is hilarious. I couldn't stop laughing after I took it.  Here's a twist on the typical profile belly shot.  I wonder at what point my feet will be entire eclipsed by my celestial belly.

I thought I should include a typical profile shot anyway, just to give some perspective.  I'm embracing my belly.
22 weeks 1 day

Monday, September 10, 2012

Mya Ella's Dress

I spent most of this past weekend either sewing or getting my sewing accessories in order.  I have several new baby projects that I'd like to tackle since there will be about four baby showers and celebrations to attend over the next month or so!  What a year for babies!


This cute dress with matching bloomers is for my cousin's new daughter, Mya Ella, who was born just a few weeks ago while we were still in Iceland.  I had bought the pretty floral fabric at the beginning of summer but never got around to doing anything with it thanks to my first-trimester hormones that kept me mostly napping whenever I could.

The fabric matched well with the blue micro-fiber pieces I had left over from Anna's Fabulous Five dress.  I found a cow applique that I thought was pretty adorable in the store but now that it's on the dress I'm a bit disappointed at how it turned out. The colours aren't very vibrant and seem out of place with the rest of the dress but oh well, I'm sure Mya won't mind.


I used three snap buttons along the back since making actual button holes somewhat stresses me out. I made a few early on when I just started learning to sew but the Singer buttonholer attachment, though very cool in design, doesn't work the best and sometimes chews up the fabric slightly.  


Perhaps I should just spend half an hour making buttonholes on scrap fabric to get over my wimpy nerves.   Then I'll be able to incorporate them into my future projects because I do think buttons are awesome.

The bloomers were pretty quick to make and just adorable, don't you think? That little bit of lace across the bum is my favourite part :)  The bloomers look pretty big in comparison with the dress but I suppose it's so they can fit around those sure-to-be heavy diapers!


More fun with the camera