Monday, April 30, 2012

Home Sweet Home

It's only been two days but we are quickly settling in.  We've had to make a few trips to Canadian Tire to buy things only to return them later the same day.  I also froze the first evening after going to bed, not realizing how much the temperature was going to drop overnight with the pre-programmed thermostat.  Aside from those small things we're both really loving our new home.

Here's what our living room looks like at the moment. It's mostly unpacked except for the books (first to be packed, last to be unpacked?).  The room will be brighter once those are lining the shelves.  We are thinking of changing the coffee table to something lighter as well since the space is small and there is already a lot of dark furniture.  I'm using the magazine rack temporarily as an end table until we make it out to a furniture store.


Here's Mike doing the dishes in our new kitchen. I love the kitchen. It has more storage than I'll probably ever need, and when I cook in it I can see the light from three different windows.  Definitely a major improvement over the condo.


Finally here's a photo of me enjoying the fact that I can belt out some tunes on the guitar and not feel self-conscious that my neighbours can hear me from the hall.  Did I mention that our new next-door neighbour is a young female musician who has been touring the US and Europe?  I can't hear her so she definitely shouldn't be able to hear me!

Sunday, April 29, 2012

Closing Day


On Mike's birthday we headed to the lawyer's office up in Scarborough to sign a stack-full of papers and close on the house.  The process went a lot faster than I had anticipated after hearing stories from friends.  I couldn't help but feel like the lawyer was trying to pull a fast one on us because his spiel sounded so rehearsed.  But of course, it is. Isn't that what real estate lawyers do, all the time?

Well after that was taken care of we met with our agent to see the house one more time before moving day.  Here we are looking like a bright-eyed, excited young couple ready to move into their first house.  Our agent said it was too bad the SOLD sign was already taken down or else it would have made for a good photo.  That might have just been enough to push it over from being a cute photo to being a corny one though.

Checking out our empty new house
12 boxes - and these were only for the books!

We had the rest of Thursday and Friday off work to tackle  the packing.  Check out this neat pile of boxes.  Makes it look like we have it under control right?  Wrong.  These are only the books! Mike insists that some are mine but I'd say those would only account for one or two boxes, tops. The movers don't know what they're in for!

If you want to know how crazy our place really looked I took another photo from the kitchen looking into the living room from the opposite direction (below).  Crazy.  It was like our condo threw up all over itself.  It got a lot worse before it got better but we sure did clean it up well.  I would have taken a final photo but I had no idea where the camera was by then!


Only two days 'til moving day
Here's one more photo of Mike's teddy bear from when he was a child.  That's the only toy I salvaged from his old bedroom at his parents' house.  Don't worry, he wasn't being thrown out, just packed away in a bag so as not to get dirty during the move :)
Bobo Bear being packed up

Wednesday, April 25, 2012

Corso Italia

Tomorrow is the big day when Mike and I become intimately familiar with scary words like "mortgage", and "downpayment", and "home-owners".  That's right, tomorrow we take possession of our first house in Corso Italia, near Dufferin and St. Clair!  We're both very excited. Oh, and on top of that it's Mike's birthday.  I think it's safe to say it will be the most expensive birthday either of us will ever have.

Our offer on the house got accepted in early March after several months of looking through the late fall and winter.  We took our time looking for just the right place since we are currently renting and aren't under the pressure to coordinate buying and selling a house at the same time.  I wanted to post some photos of the place but think it's important to clarify that these came from the feature sheet when the house was completely staged. I'll update photos of the place when we make it our own.  I was relieved though that when I visited the house last week and it was empty of all the beautiful rented furniture it still felt like home.

Living Room
Dining Room
Kitchen
 The house is a semi-detached from the 1930's which has been renovated on the first and second floors with a basement that is finished but not newly renovated.  There's a detached garage in the back that is accessed through a shared laneway and as you can imagine, being a house right in the city of Toronto, there isn't much in the way of greenery out back.  There does appear to be a strip of garden beside the grass though, so it will be interesting to see what the previous owners planted in the front and back yards.  I'm sure my mother and mother-in-law are anxious to get their green thumbs busy with this new project :)  Mike and I would be grateful for the help!

Master Bedroom
Office (and my new sewing studio?)
Move-day is on Saturday - I can hardly wait!

Tuesday, April 17, 2012

Bicycle Toronto 1937

We celebrated my brother's birthday this past weekend and I gave him this cool Toronto bicycle license plate I found on eBay. I beat out another bidder who, from his/her bidding history, seems like a big collector of all things "vintage" having to do with bicycles.  No way I was going to be bullied out though.


My brother's really into fixing up old bikes and has about 8 stashed away at his condo (or in my parents' basement!)  He's in the process of putting one together for me actually, and I'm looking forward to riding it this summer and having a garage to store it in once Mike and I move into our new house at the end of the month.

Anyway the gift was well received. Now he just has to figure out which bike it should go on!

Beaded Grey Top

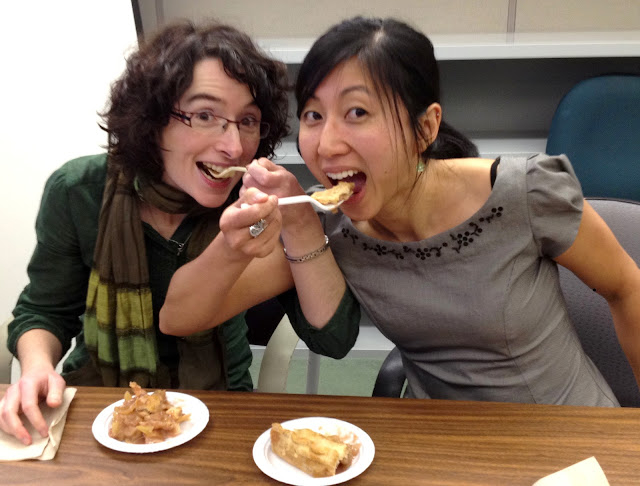
Okay, it's time to post this top I made several weeks ago but never got around to taking photos of...at least not until last Friday when I posed for this silly photo with my good friend Brigitte.

Mmmm apple pie!


The top was made using the same pattern from my Scottish Piping dress, only I chose to cut off the pattern just below the waist and flared out the panels for a looser fit along the bottom.  I was excited to try out the puff sleeves for the first time (there hadn't been enough wool to add sleeves to that dress).

I hand-stitched small black tube beads and sequins to create floral detailing along the neckline of the top.  I didn't bother taking any close-up shots though...I already posted some good pics of similar beadwork on the Easter Weekend shirt I made my mom last weekend.

Mike did however snap one more photo for me at the end of "Pie" day just before I crawled into my comfy pajamas and cheered for the weekend.


Monday, April 09, 2012

Easter Weekend Birthday Top!


Last weekend I started a new top for my mom based on one that I had just finished for myself (and haven't posted yet).  It was cream coloured with little red swirls on it.  Unfortunately I had a hell of a time trying to get it to the right size!  I was reusing the pattern from my own shirt and planned to just cut the fabric slightly larger for each piece so that the top would be the right size for my mom.  I must have forgotten to widen the side panels because after I sewed it all together I was convinced that the shirt was just too narrow below the bust.  

I came up with a clever design where I opened the side seams and added the same fabric with some elastics sewn in to look like there was ruching under the arms.  I figured this would give the shirt extra room to grow if necessary without looking baggy otherwise.  Well it turned out that when my mom tried it on last week it was definitely too wide (oh boo).  It was almost as if I never needed those extra side panels at all!  So, there I was, ripping out the side panels that I had just sewn in and then restored the shirt to the original size.  My mom tried it on and no wait....now it was just an inch too tight under the bust line! I gave up.  I couldn't look at that top anymore and opted to put it aside, perhaps finish another day for myself.  


I decided instead to start fresh with a new shirt but this time was much more careful cutting out the fabric!  I chose to do a gold coloured top with black binding which I thought would look less casual than the original fabric.  After I was happy with the construction of the shirt I repeated all the steps to create the black lining.  


Next I hand-stitched a black floral pattern onto the front using sequins and beads left over from my latest shirt.  Then I basted together the necklines from the main fabric and the lining in preparation for sewing on the black trim binding to hide the raw edges.

hand-stitching sequins and tube beads to create this detailing 
 I ended the zipper a few inches from the neckline to make it easier for my mom to reach from behind, then added a snap button to secure the corners together.
Invisible zipper with snap button

Here is the final product!  I originally had a black ruffle trim along the very bottom seam but my mom thought that it made the top look "too fancy".  She explained that with the trim she would only be able to wear it out in the evening but without the trim she could wear it more casually, like to the grocery store.  Good grief.  I hope I didn't spend 2.5 hours hand-stitching itty bitty beads so that she could run out for some milk and eggs!  Anyway at least I agreed that the ruffle trim didn't look right after she tried it on so it was an easy fix to remove it and put in the black binding.

Tuesday, April 03, 2012

Lost Wax Casting: Floral Ring


Here is the last jewellery project I designed from my model making course which ended in January.  It was my first real project where I had to do a lot of tiny intricate carving.  The cuff bracelets I made were easier to work with because I had more surface area and the designs weren't detailed, although of course it took much longer to finish each bracelet.  I definitely saw an improvement in my carving from when I started to when I finished this ring, and in fact what I'm showing off below is the nicer side :)  The floral stems flow much more smoothly on this side than the other.
Ring in sterling silver prior to polishing
It took a number of weeks before I decided to finally cast the ring.  There are several casting houses downtown but none seem to be open on the weekends and they're usually closed by the time I get home from work. I ended up taking it back to Shao's studio (where I got my floral cuff bracelet cast).  Then I rented 2 hrs of studio time there to clean it up nice and shiny.  I darkened the recessed areas to bring out the details of the carving and couldn't be happier with the results!

Final wax model 
Ring after polishing and oxidization